Some machines have "self adjusting tension". For those of us who don't have these types of machines, we need to pay particular attention to thread tension, especially at the beginning of a new project. Imagine the needle goes down into the fabric and a sharp hook catches the needle thread and wraps the bobbin thread around it. If the needle tension is stronger than the bobbin tension the needle will pull the bobbin thread up through the top side of the fabric. Likewise if the bobbin tension is too strong, it will pull the thread through the fabric to the underside of the material. Perfect tension is where the threads locks together between the top and the bottom layers of fabric.
These videos will show you how to determine if your tension is set properly.
Video 1 of 3
Video 2 of 3
Video 3 of 3
Sunday, December 5, 2010
Thursday, November 18, 2010
Britex Fabrics - Welted Pocket/Vest Tutorial
Bespoke Vest with Welt Pockets
November 18, 2010 by Britex Fabrics

Melissa from Art of Sewing has detailed her process in sewing a lined vest with welted pockets for her friend, The Professor. This charming bespoke waistcoat was made with Britex wool and lining, and accessorized with favorite buttons from an old vest of The Professors. Her journey starts on August 26th and ends October 7th, with the welted pocket tutorial running Sept 20th to the 24th. I love the beautiful contrasting red top-stitching and buttonholes!
November 18, 2010 by Britex Fabrics
Melissa from Art of Sewing has detailed her process in sewing a lined vest with welted pockets for her friend, The Professor. This charming bespoke waistcoat was made with Britex wool and lining, and accessorized with favorite buttons from an old vest of The Professors. Her journey starts on August 26th and ends October 7th, with the welted pocket tutorial running Sept 20th to the 24th. I love the beautiful contrasting red top-stitching and buttonholes!
Sunday, November 7, 2010
McCalls's M5538, Polartec Fleece Jacket Project
 |
My new project has barely begun and I am already seeing the challenges ahead! The fabric I have chosen is a Polartec Fleece. I am not sure of the official weight/warmth but can say that it is a rather dense fleece and of a higher quality than others I have seen. I began pinning & cutting my pattern pieces yesterday and noticed immediately that the 1 1/4 inch pins I was using were not quite long enough. In addition they were tearing up my thumb working with the thickness and density of the fabric. I found some 1 1/2" ball headed pins tucked away in my sewing case and these worked through the fabric better and were much easier on my fingers.   Needle choice was also a question. The above are special extra sharp needles and were designed for microfiber fabrics. When starting a project like this, it's always good to start with a new needle & make sure you are using the proper type.  I will be using 100% poly thread for this project. It is recommended to be used with fleece. |
Friday, October 29, 2010
Home Decorating Projects

 |
| 100% Pima Cotton Pillow Cases |


Tuesday, October 12, 2010
Halloween Costume - Simplicity 3629
I have made a few costumes in the past. :) This was a fun one to make!
The pattern was easy to follow too.

Thursday, October 7, 2010
Men's Lined Vest Finished
 |
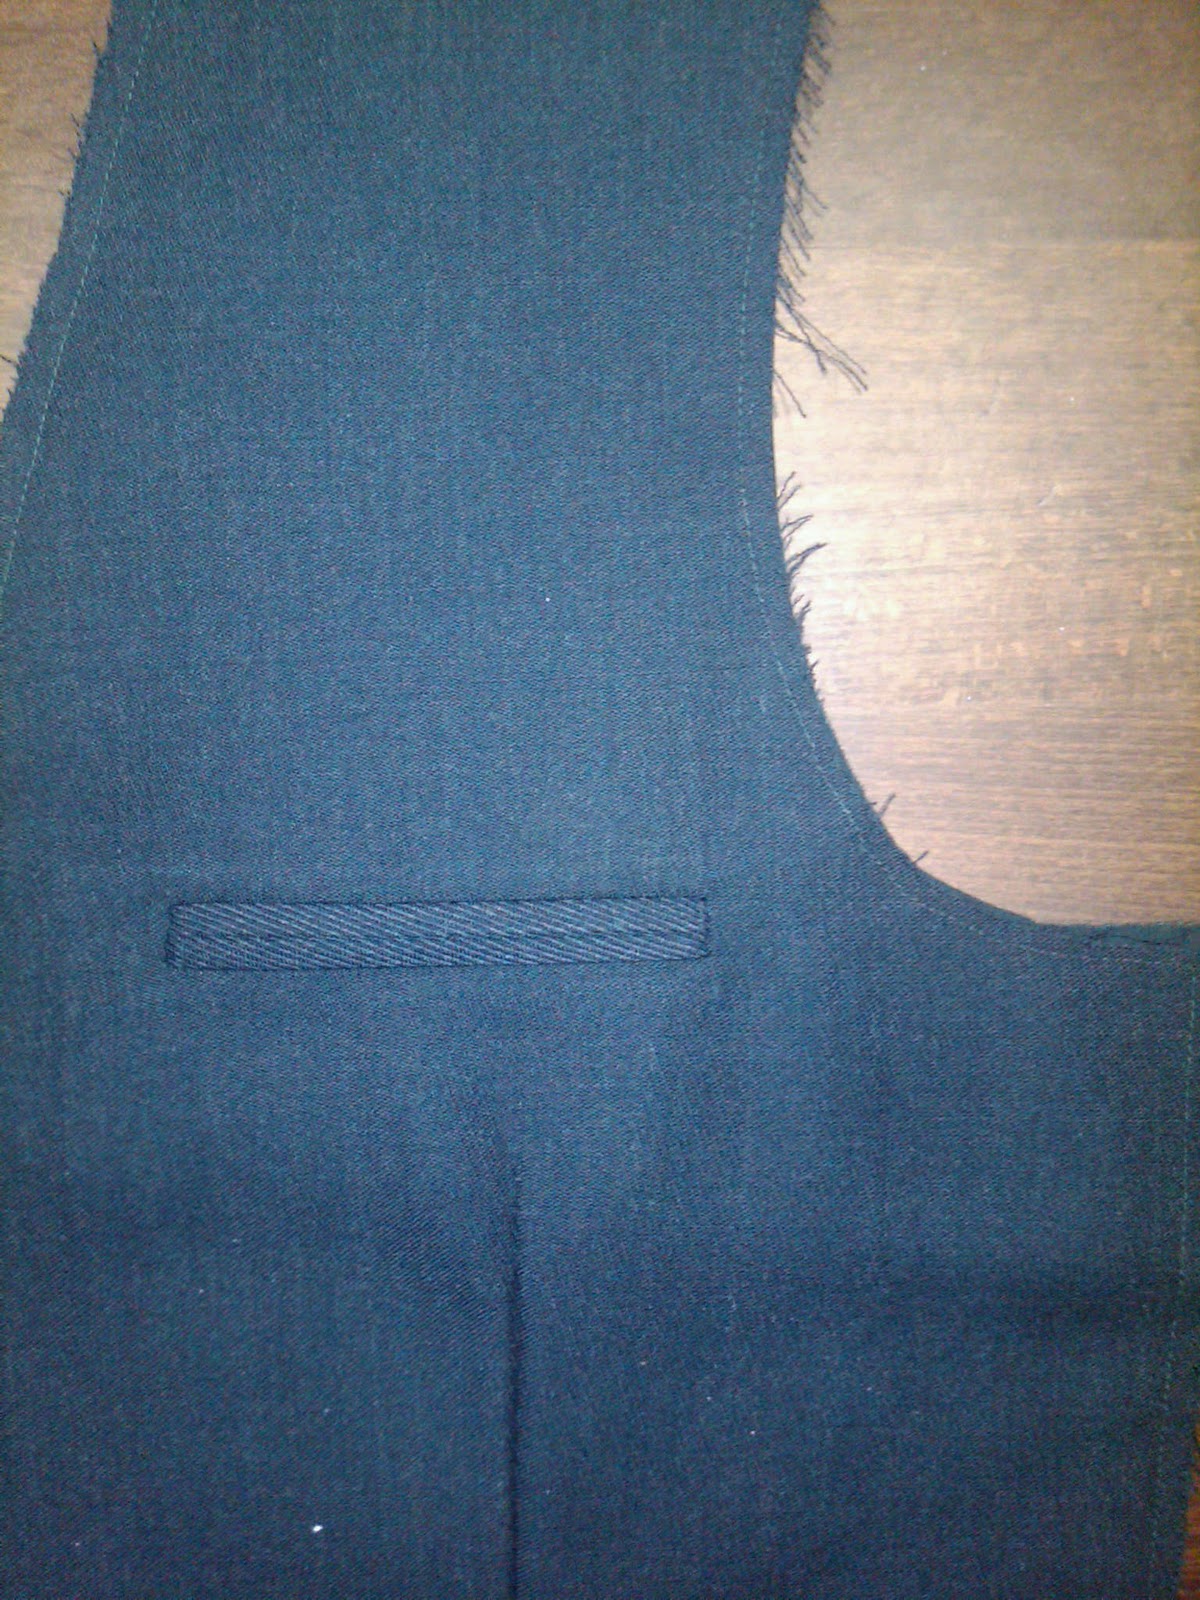
| The Professor's Vest: I used a Simplicity 2870 pattern and modified it slightly in design, lined it, and added inside pockets. The pattern did not have directions to line nor did it have good directions for making a welted pocket... So if you look at some of the recent older postings (Sept 20-24), you will find my directions for making a welted pocket that should work better for you. |
 |
| I decided to do some decorative top stitching to match the lining and also the button holes. The top stiching was done with a thicker top stitching thread and if you try this on a project, be sure to use a top stitching needle. |
 |
| The buttons were taken off the Professor's old vest. |
 |
| The pockets where slip stitched to the inside. One pocket for his wallet and the other for his glasses and pens. |
Sunday, September 26, 2010
Random Notes on Welts and Vest Status
If you have a welt pattern that is a narrow one inch strip and the directions are telling you to cut two pieces and fold each in half to make the welt, I would recommend that you toss it. These were the instructions on my Simplicity pattern and after much struggling the welt looked pretty bad. The below directions for making a welt will work much better, but you will want to practice making the welt several times before you attempt on your garment. Having a great iron that steams well is going to make a big difference too.
Second thought for the day is that I had to put my vest project on the back burner for several weeks as I was dealing with some things, but I should be finished up in the next day or two.

 The Professor asked that the buttons from his old vest be transferred onto the new one.
Second thought for the day is that I had to put my vest project on the back burner for several weeks as I was dealing with some things, but I should be finished up in the next day or two.


Friday, September 24, 2010
How to Make a Welt Pocket (Part 3)


After you have clipped both ends in this fashion, push the pocket through the opening you just made and flatten out the welt. The next part is very important, so don't skip this.


Wednesday, September 22, 2010
Welt Pocket (Part 2)


Fold the top down so that the top edge of the interfacing matches the horizontal line and iron.


Monday, September 20, 2010
Welt Pocket (Part 1)
Welted pockets are not nearly as difficult as you think!
Have some patience with me and I will show you over the next few days exactly how this is done.
Tuesday, September 7, 2010
Front Vest Darts & Interlining


The next step will be to make the welted pockets. I attempted to follow Simplicity's directions for a welted pocket, but the result was not pretty. The problem is that their technique is not an accurate way to make the welt and you will very likely end up with the top and bottom welt not matching and not even. I have a different technique I plan to use and will share that with you so that we can compare the results of the Simplicity method vers. my preferred method.
Sunday, August 29, 2010
Taylor Tacks --- How Do You Mark Your Fabric?
There are so many ways to mark fabric. Pencils, Pens, Chalk, Tracing Paper, Soap Stone, Thread, etc. I was taught to make taylor tacks using thread.
Second to taylor tacks and depending on the type of fabric and application, I will sometimes use a piece of soap stone or chalk. I've never been a big fan of using pencils, pens, or tracing paper.
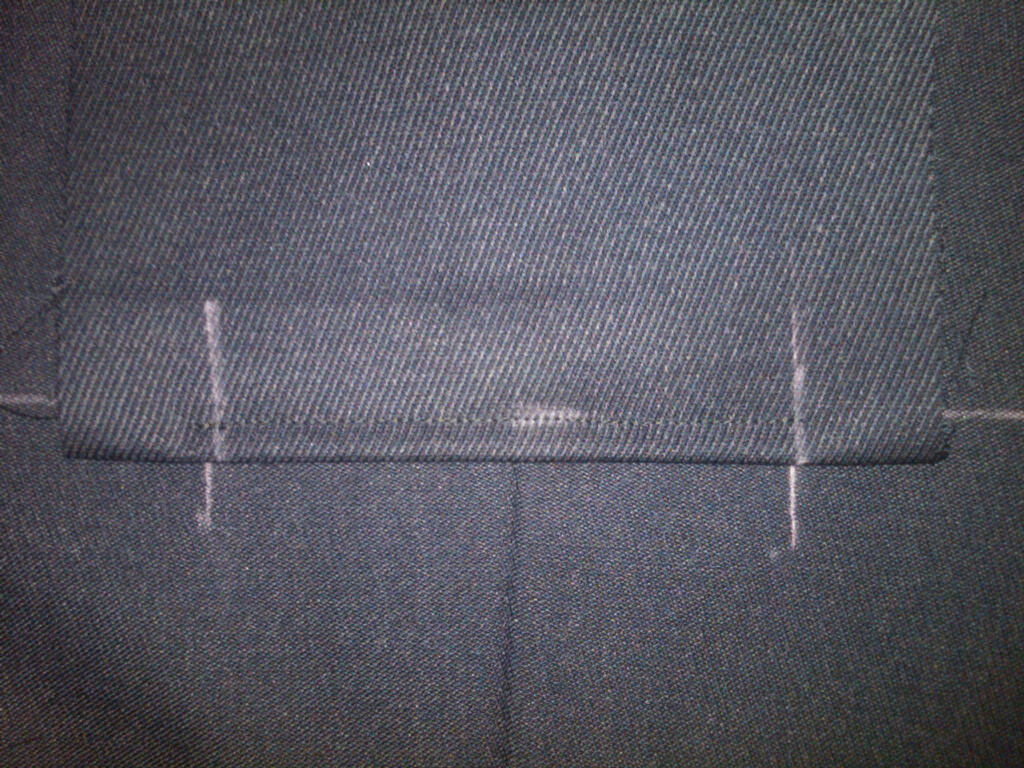
In the below picture, I have made my taylor tack through four sections of fabric. They are extra long to ensure all pieces of my fabric are still marked after pulling apart and clipping.

Second to taylor tacks and depending on the type of fabric and application, I will sometimes use a piece of soap stone or chalk. I've never been a big fan of using pencils, pens, or tracing paper.
In the below picture, I have made my taylor tack through four sections of fabric. They are extra long to ensure all pieces of my fabric are still marked after pulling apart and clipping.

Thursday, August 26, 2010
Men's Lined Vest, Simplicity 2870 - Project Runway


Subscribe to:
Posts (Atom)