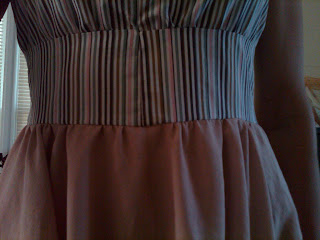
 |
| My daughter modeling the finished dress. |
CREATED TO INSPIRE AND ENCOURAGE THE CREATIVE FORCES OF THE ARTISIAN SEAMSTRESS
Friday, July 23, 2010
Draping & Sewing Chiffon
The last part of this project was to drape & attach the chiffon. I decided against using the chiffon under the skirt because it was a bit too much and I didn't like how it was looking. However, I do like the chiffon around the neck and the back portion. It took some time working with the chiffon and getting it to drape just right. I pinned the chiffon in place from the inside of the garment and then used small tacks under the outside fold. After taking a couple stitches for the tack, I allowed the outside fold to naturally fall back in place where it covered the tack. Then I carefully took a couple additional straight stitches along the fold line, again tacking against the garment. Since I lined the inside of the dress, I was able to tack without the tack marks showing on the inside of the garment. I know it's sort of ocd of me, but I used light colored thread to match the chiffon and didn't want it showing on the inside of the dress which is navy. I am hopeful I will have some pictures later today of the finished dress that I can share.
 |
| Straight stitch along fold. |
Monday, July 19, 2010
Hemming A Deeply Curved Skirt
Thursday, July 15, 2010
The Proper Way to Adjoin Shoulders and Sew Shoulder Seams of a Lined or Faced Garment w/o Sleeves
I have to admit that I was not thinking ahead when I lined the bodice pieces. All is fine though. As you can see in my prior pictures from the other day, I even sewed the garment to the lining at the shoulder seams. What can I say except, I should never sew late at night. I ended up having to take those stitches out on both pieces so that I could attach the front of the bodice to the back of the bodice the proper way.
In the past, there has always been an element of confusion in my attempts to figure out exactly how to go about doing this. What's worse is trying to read directions on how to do this! I made a costume for my daughter once using a Simplicity pattern and the directions literally had me in a daze. In the end, I got it... but there is something about sewing that can be somewhat like a jigsaw puzzle. My attempt today is to provide with clarity, written instructions on how to adjoin and sew shoulder seams of a lined or faced sleeveless garment.
By the way, when I refer to left and right side, I am referring to left and right as you see the garment lying on the table in front of you.
- Take the front bodice, turn inside out, lay flat on counter with unlined portion facing up.
- Take the back bodice, right side out, lay flat on counter with unlined portion facing up.
- With garment pieces in this position, slide back bodice inside the front bodice.
- Carefully slide the right back bodice shoulder strap inside the right front bodice shoulder strap, without twisting the direction of straps. Slide up far enough that the raw edges of the shoulders meet and pin in place.
- Do the same to the left side.
- Sew 5/8" seam across the shoulders and turn the garment pieces out so that everything is right side out.
Wednesday, July 14, 2010
Sun Dress Progress Report
 |
| I plan to shorten the skirt. |
The chiffon will go under the skirt and extend below the skirt hem line.
 |
| Working on lining the back bodice. |
Monday, July 5, 2010
Beginning of Prototype... Not The Final Dress
At this point, what I have done is to come up with a simple sundress design and I am currently working on minor modifications. The fabric I used on this prototype is some remnant fabric I had lying about the house. Once finished I will make a master pattern and start the final project. The top portion of the dress will be lined and I will be using the chiffon as accents.
Friday, July 2, 2010
Princess seams, and other treacherous curves! - Threads
Princess seams, and other treacherous curves! - Threads
Another great demonstration from Threads Magazine.
Another great demonstration from Threads Magazine.
Subscribe to:
Comments (Atom)


