Monday, May 31, 2010

Saturday, May 29, 2010

Vest Pockets

This was the most daunting part of the project thus far.  I have not made many pockets in the past and especially the type that are set into the garment as opposed to built into the side seam.  It was making my stomach churn at the thought of cutting through my two front pieces.  My solution was to make a sample pocket first using a piece of denim.  After I was able to accomplish this successfully I felt more confident about moving forward.

My first task was to outline on the garment where the sew lines and cut lines would be.  I then used chalk to mark a piece of black broadcloth just as I had marked the garment front pieces.  I matched the outlines against each other and pinned the broad cloth directly on top of the garment.
The next step was to sew the top and bottom horozontal lines and curve around each corner by about 2 or 3 stitches.

Next I used a sharp pair of clippers to cut the horozontal cut line that ran between the 2 sewing lines and then cut diagonal slits up to the corners of where I sewed previously.
The next step was to pull the broadcloth through the slits to the wrong side of the fabric and carefully iron it smooth.  I like using the starch at this point because I want to be sure I have very clean looking lines
This is the pocket flap.  I have cut two pieces for each side and sewing the rights sides together at the sides and across the bottom section, leaving the top open so that I could flip the right side out and press.  When I am making two duplicate looking items and I really want to be sure they look like duplicates, I like to use tracing paper to sketch in my sew lines. 
As a decorative addition, I put a piece of satin across the top of the pocket flap.  I top stitched around the flap and insert it directly into the pocket opening and stitched it into place  Two more squares of broadcloth were needed to attached to the piece of broad cloth already sewn into the garment, thus creating the pocket.  My final touch was to ditch stitch into the seam of the pocket flap where my satin met the edge of the top pocket.  Doing this secured the satin and ensured that the pocket flap was finished properly at the top edge.


Monday, May 24, 2010

This Weekends Progress Report

I finished the entire vest lining and it turned out just fine.  This is a rayon lining and you can see how badly it ravels.  I top stitched the seams to keep this to a minimum.  I think the lining looks better with the top stitching too. 

I added the back portion of the belt this weekend.  No problems here. 
The back belt is top stitched to the back as seen above. 
These two pieces will be sewn into the side seams and wrap around the front.  In addition, I will being covering the belt buckle with the black fabric.  My first try at one of the belt pieces did not work well.  By the way, I used sew in interfacing on each piece to give a more stable and stiff belt.  After turning the belt right side out, the shape was obviously out of wack.  I had to recut that portion of the belt, but ran into another problem that we all have had at least once or twice.  :)  I poked through the end while turning the belt rightside out.  I had to go through that whole tedious process of re-turning and re-sewing the curved end.  What I learned and have decided is that for all future projects to double stitch end pieces like this and also corners pieces.  Anotherwords, sew directly on top of your last row of stitching in critical areas.  It reinforeces but honestly does not add bulk.  As you can see in the collar below, the corners are sharp and near perfect.
I am happy with my collar and collar band.  Nice corners.

Saturday, May 22, 2010

Vest Construction

Front of Vest.  You can see that the front underarm cuts in slightly.  I have determined that this is alright and will simply make a modification to my pattern piece for the next time I make this.  In this instance, it is alright because it works into the 5/8" seam allowance and I can work with it.

 Back of Vest, Worked out exactly as I would have liked.  
You can see again that my pictures do not provide a very good reference for color.  In truth, the fabric is a dark black with slightly fainter black making up the distinction of horizontal lines.   I am working on finishing the lining today and need to run out to the fabric store to pick up some additional interfacing for the collar and future projects.

Sunday, May 16, 2010

My Pattern Design and Fabric for Blouse / Vest


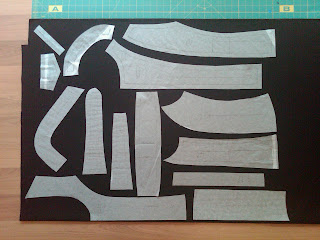
This is the basic pattern I have come up with for the blouse/vest.  I can never seem to get the color right in some of these photos I've been taking.  The above pink fabric is actually bright red and the black is a heavy weight textured cotton.  Based on my last project, I will probably end up altering some of these pieces, but will determine how much as I start the blouse construction.

Thursday, May 13, 2010

Joseph S Domingo Display


Isn't this a beautiful gown!  I think it is absolutely enchanting and feminine.  This display can only be found by those romantics who are madly in love and wandering the streets of San Francisco.

I took some time away from my sewing recently to do some family things, but I am back in full force.  I finished designing my pattern last night.  Either tomorrow or over the weekend I will pick up my fabric and cut everything out.  I am definitely going to take my time on this and will update along the way.

Saturday, May 1, 2010

Knock off Blouse of Macy's Exclusive Line, INC International Concepts


I had so much fun with my last project that I decided I would like to try another knock off replica.  A couple years back I purchased a blouse from Macy's that is tagged with their exclusive line INC. International Concepts.  Great little blouse and it's lined too.  I'm coming up with some ideas to change it up some, but all in all they will be very similar.  Below are the pictures.  Front and back pieces are made up of 6 panels each, with a belt that loops around.  The front is connected every 3/4" with a hook and eye.  I plan to make my rendition a bit more form fitting.  Tomorrow I will begin the process of designing my pattern pieces.  Wish me luck! :)